

This integration is available in Dash Social’s Advance plan and above. Salesforce API access is also limited to the Enterprise, Unlimited, and Performance editions of Salesforce, as well as Professional Editions with the paid API add-on. See Salesforce documentation for more information.
Getting Started
Before you begin, ensure you have:- Salesforce admin access to install managed packages and configure components.
- Dash Social admin access to connect your Salesforce organization.
Installation Steps
This section contains the following steps:- Installing the Managed Package from Dash Social
- Configuring App Manager Permissions in Salesforce
- Embedding Dash Social to Your Salesforce Case Page Layout
- Connecting Salesforce to Dash Social
- Setting Up Field Mapping
- Testing the Integration
Step 1: Install the Managed Package from Dash Social
The first thing you’ll need to do is install the managed package available from within Dash Social.You must have Salesforce admin access to install managed packages and configure components.
- In Dash Social, go to Settings → Integrations.
- Locate Salesforce in the integrations list and click Connect Salesforce.
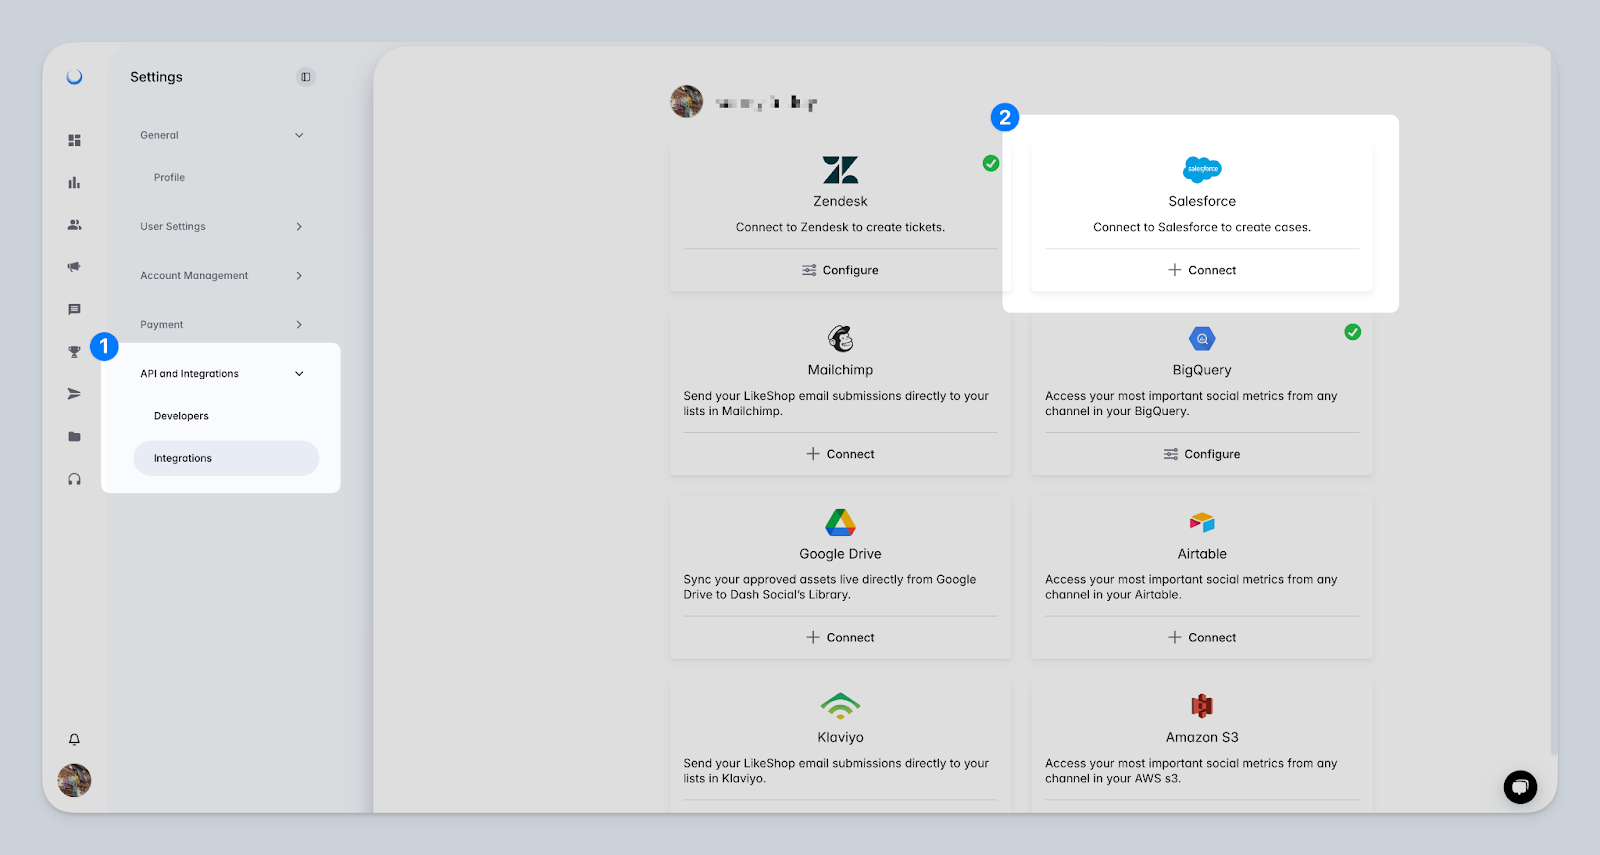
- Click Install Salesforce App. This will open a new window to Salesforce.
- On the Salesforce installation screen, select Install for Admins Only (recommended for initial setup).
- Check the acknowledgment box regarding Non-Salesforce Applications and click Install.
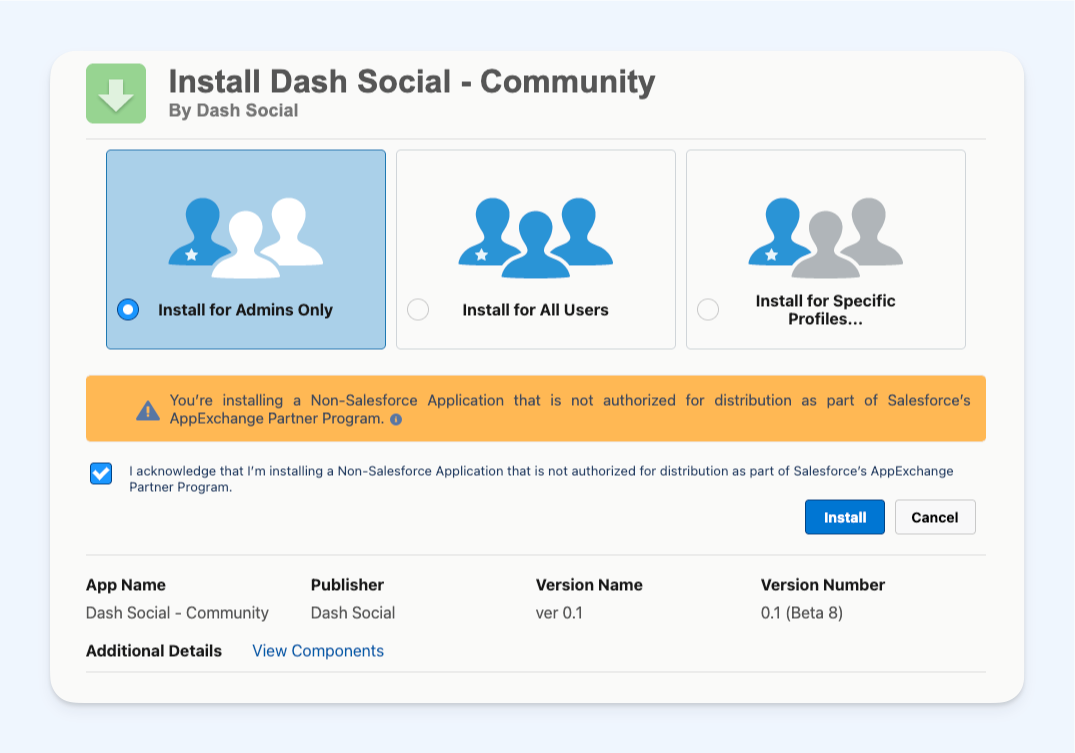
- Wait for the installation to finish. This may take a few minutes.
- Once installed, you’ll see “Dash Social - Community” in your list of Installed Packages in Salesforce.
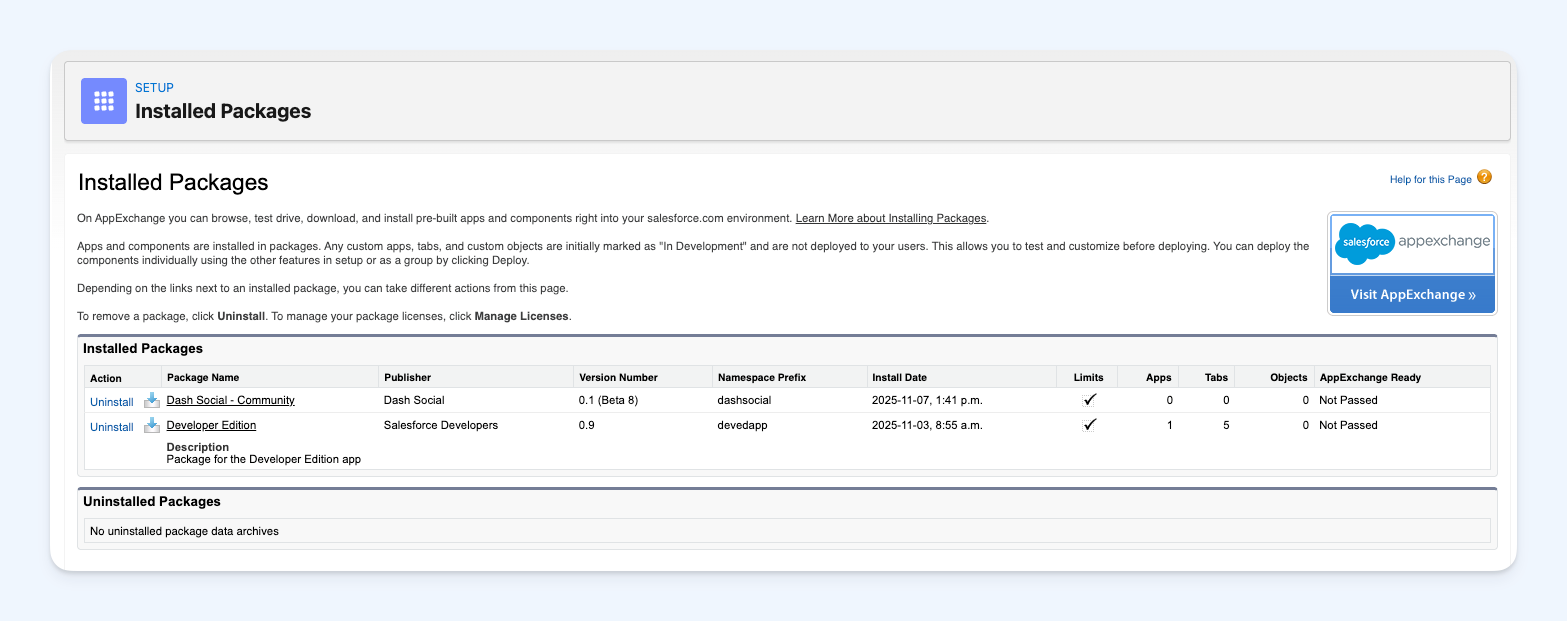
Step 2: Configure App Manager Permissions
By default, permissions are set to “All users may self-authorize”, which requires each user to individually authorize themselves when they first access the Dash Social component in Salesforce. For a more streamlined experience, we recommend changing this to “Admin approved users are pre-authorized”, which pre-authorizes specific users/profiles to skip individual authorization. Here’s how to configure permissions in App Manager:- In Salesforce, navigate to Setup → App Manager.
- Locate the “Dash Social - Community” connected app, click the dropdown arrow, and select Manage.
- Under OAuth Policies, next to Permitted Users, switch from “All users may self-authorize” and select “Admin approved users are pre-authorized”. Click Save to apply this change.
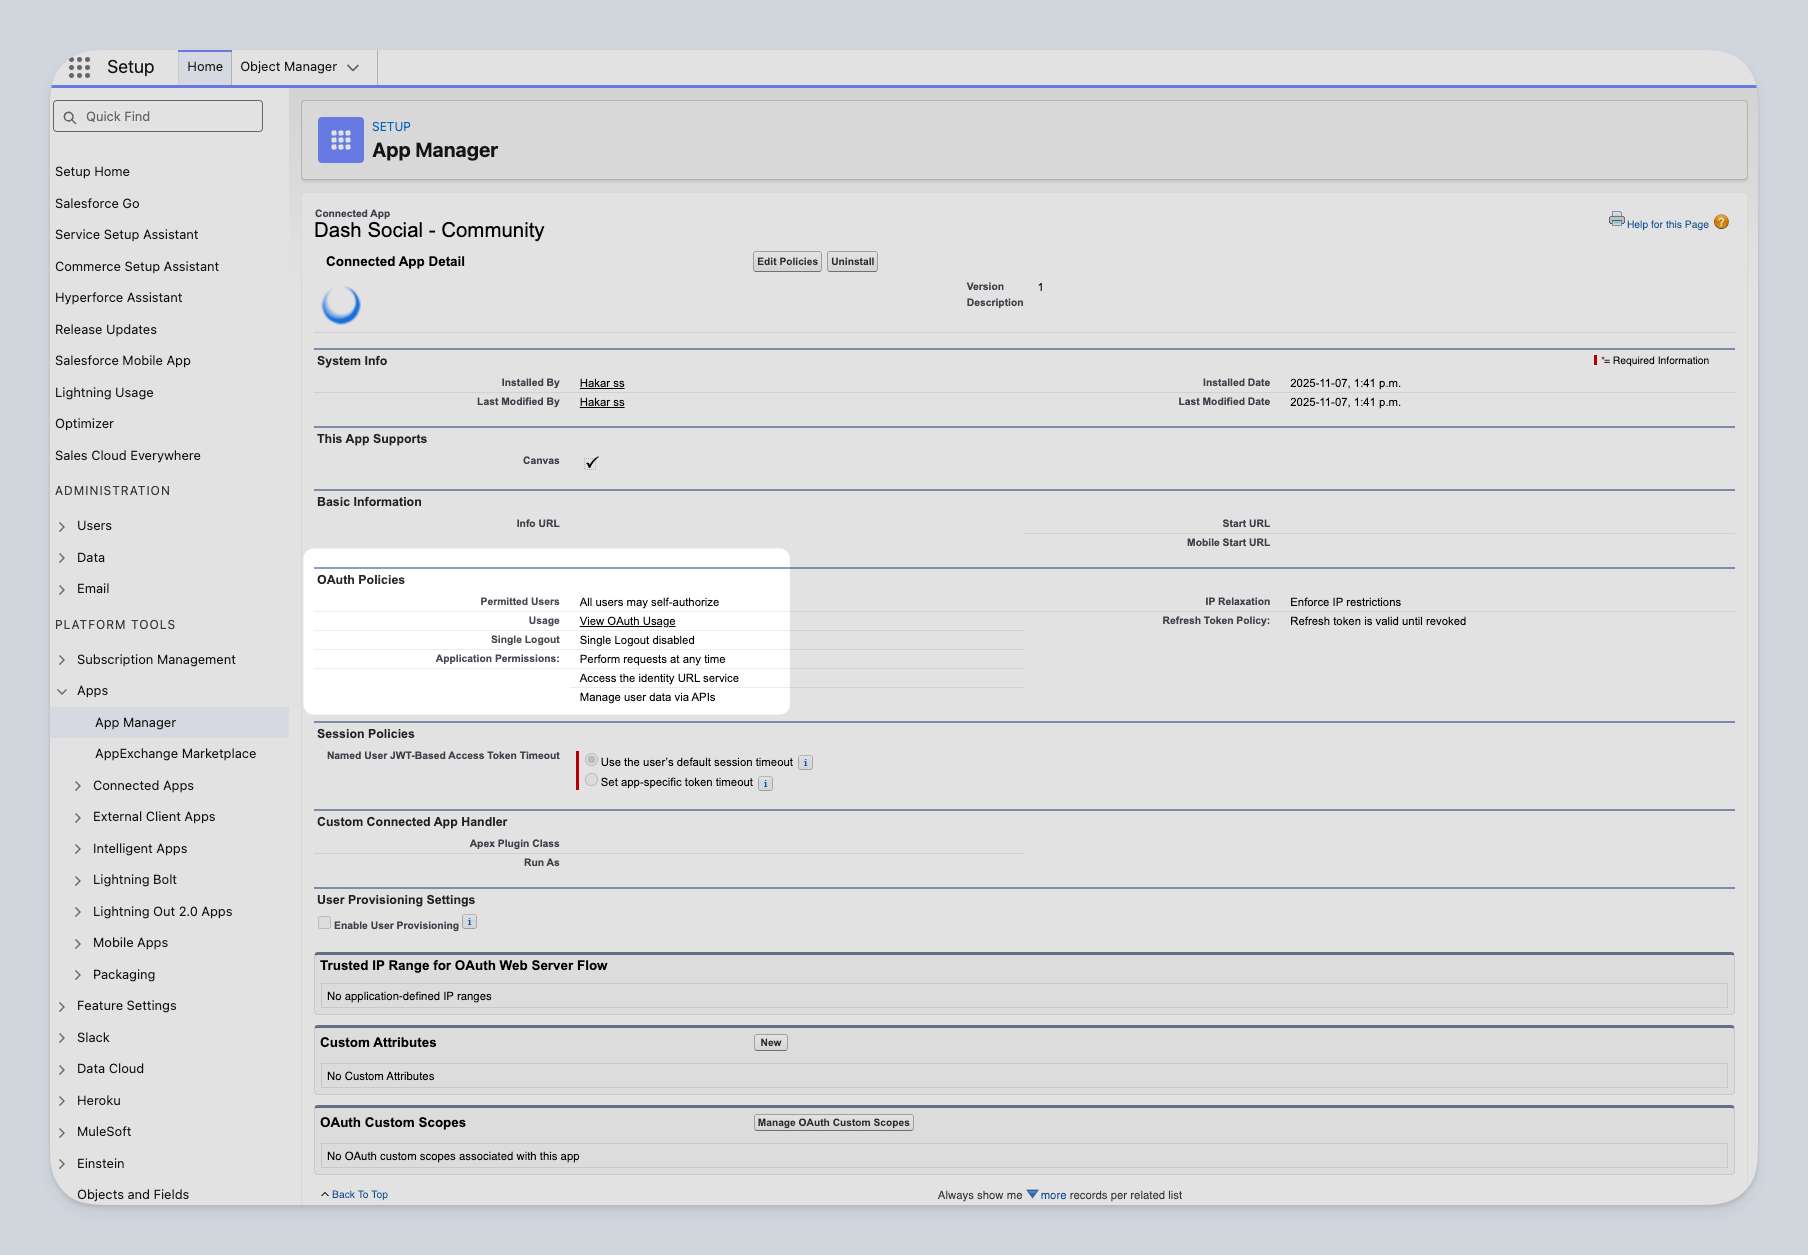
- Next, click Manage Profiles or Manage Permission Sets.
- Select any profiles/permission sets that should have access and click Save.
Step 3: Embedding Dash Social to Case Pages
Next, you will need to add the Dash Social component to your case page layout in Salesforce so you can respond to Community messages directly within Salesforce. Both processes are outlined below:Using Lightning Experience
To embed Dash Social to case pages using Salesforce’s Lightning Experience, follow the steps below:- Navigate to Setup → Object Manager.
- Search for and select Case. You can also access it directly on the Cases page.
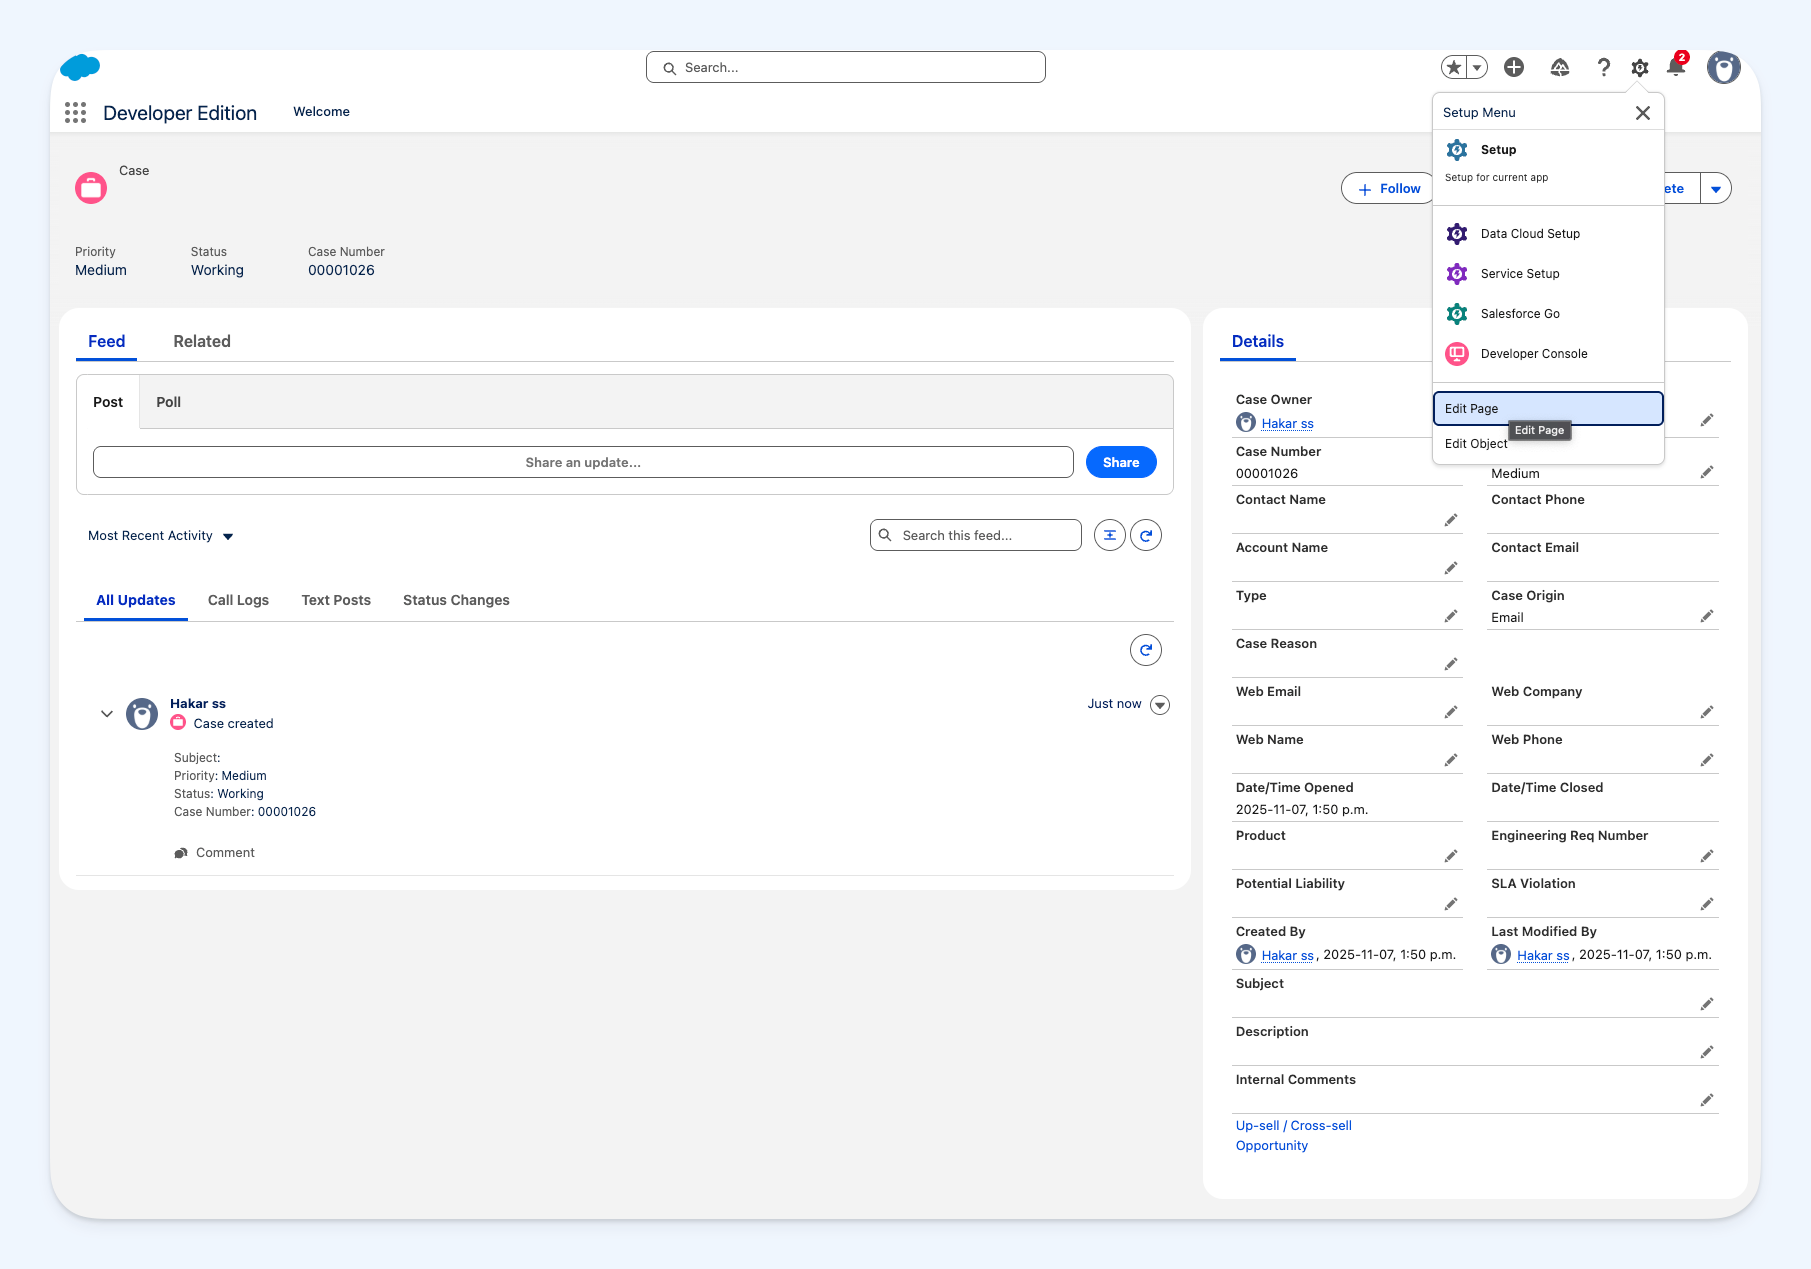
- Click Lightning Record Pages.
- Select your Case record page (or create a new one).
- Click Edit to open the Lightning App Builder.
- In the Components panel, click on the Tabs component in your page layout to view the tab configuration.
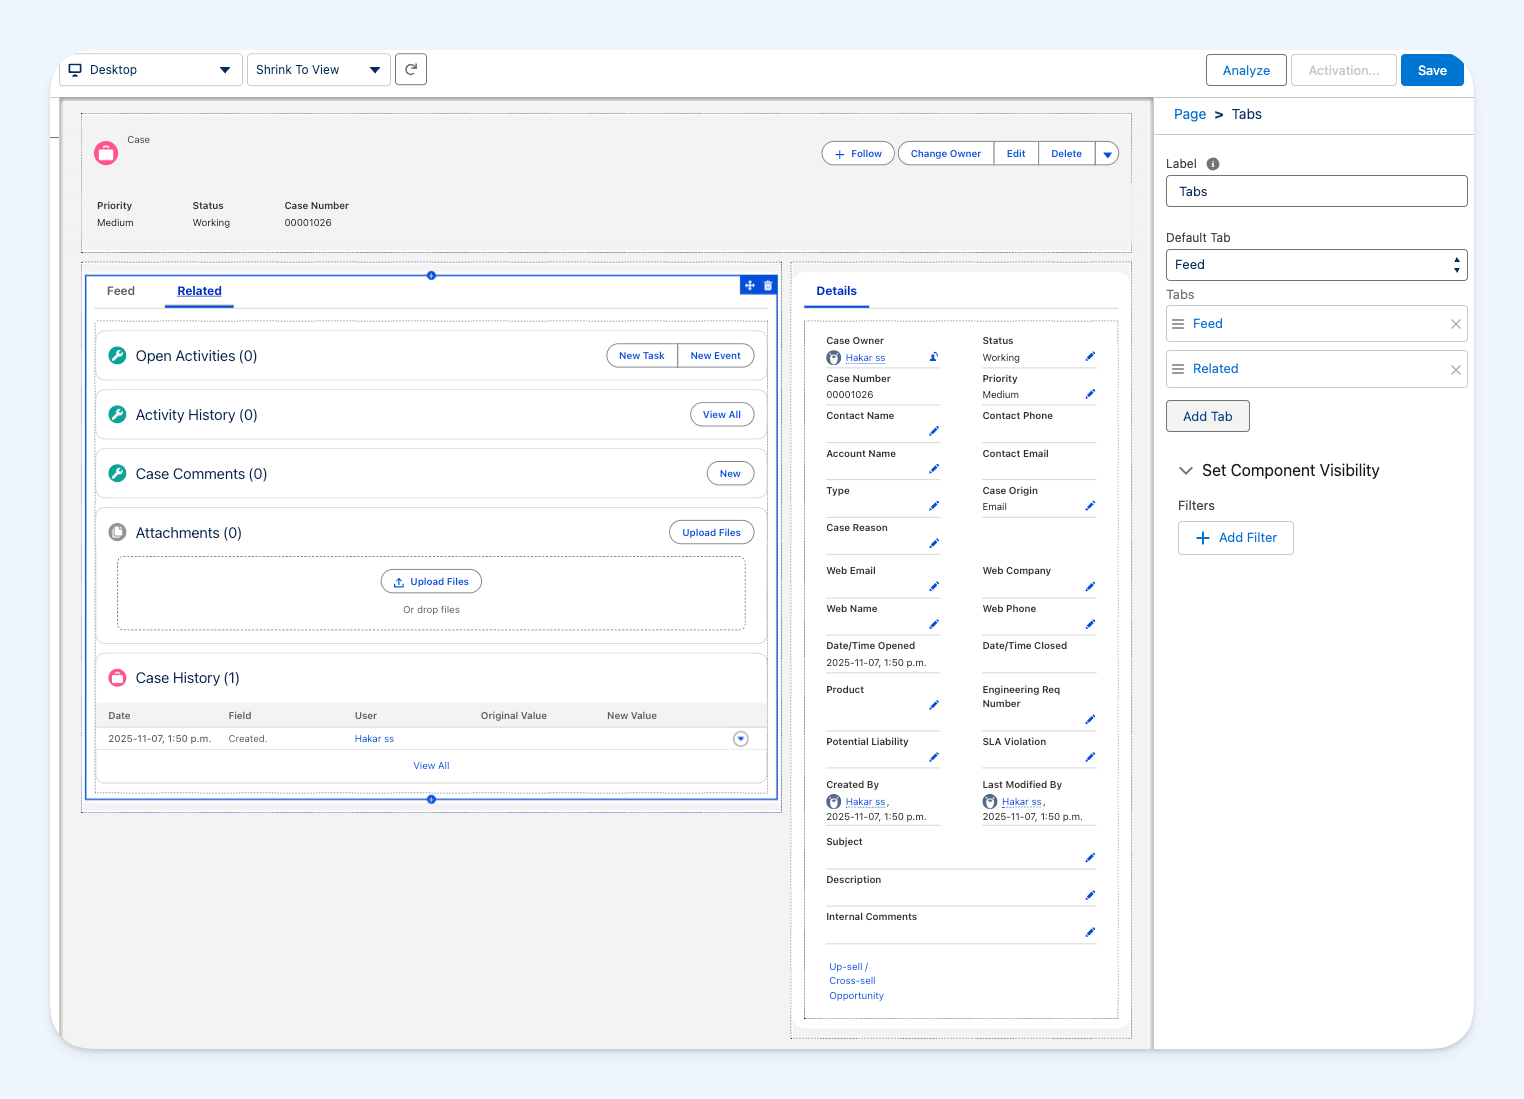
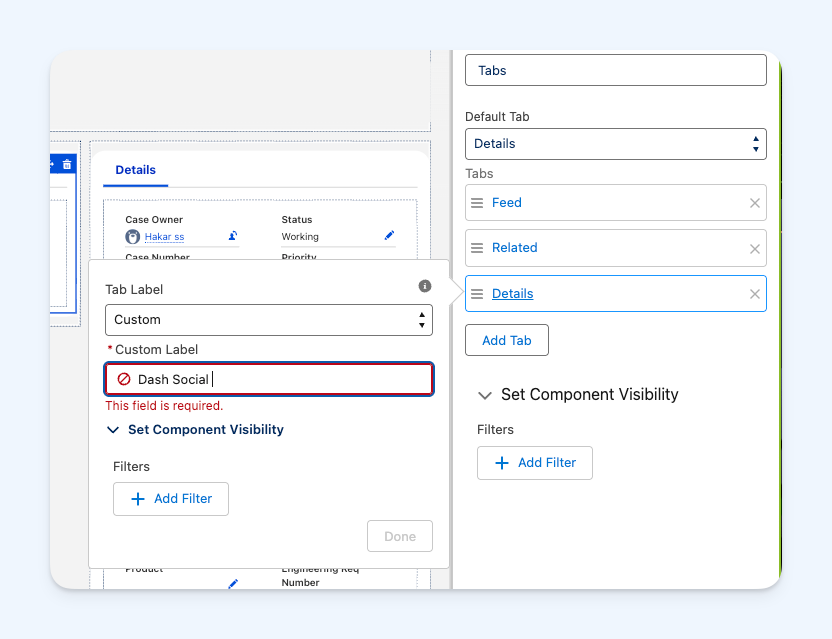
- Click Add Tab to create a new tab. Then configure the new tab as follows:
- Tab Label: Enter “Dash Social” (or your preferred name).
- Custom Label: Enter “Dash Social” in the Custom Label field.
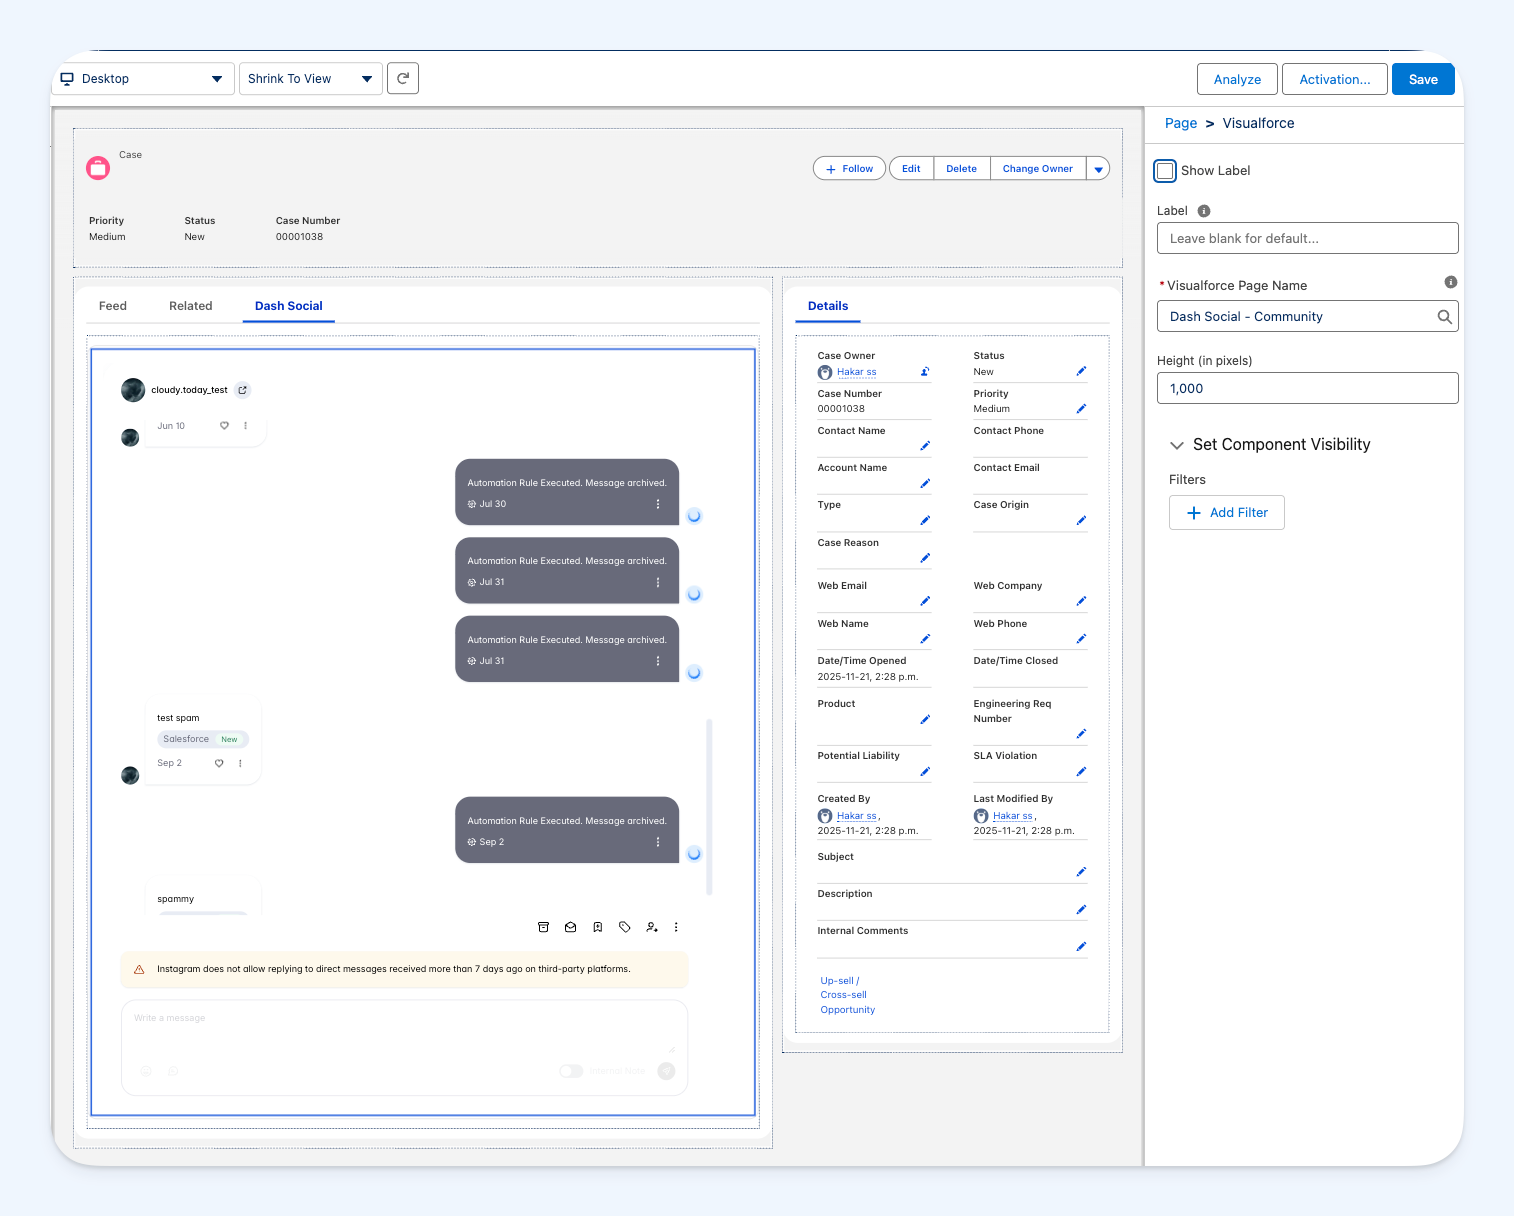
- With the new tab selected, click Components in the left sidebar.
- Scroll down to the “Visualforce” section.
- Drag the “Dash Social - Community” component into the tab.
- Set the “Height” component to 1000 pixels or adjust as needed.
- Click Save.
- Click Activate (if not already active) and assign to the appropriate app, record type, and profiles as needed.
Using Classic Experience
To embed Dash Social to case pages using Salesforce’s Classic Experience, follow the steps below:- Navigate to Setup → Object Manager → Case.
- Click Page Layouts.
- Select your Case page layout.
- In the page layout editor:
- Click Visualforce Pages in the left sidebar.
- Drag “Dash Social - Community” onto the page.
- Set the height to 1000 pixels.
- Click Save.
Step 4: Connect Salesforce to Dash Social
Now that you’ve finished installing Dash Social within Salesforce, it’s time to finish the integration process by granting Dash Social permissions to create and update Salesforce cases.You must have Salesforce admin access to complete this authorization.
- Back in Dash Social, go to Settings → Integrations → Salesforce.
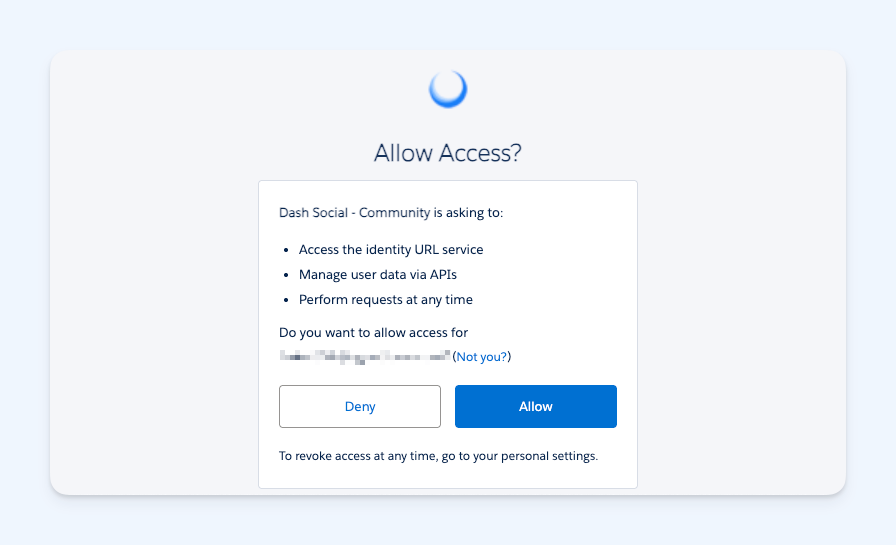
- Click Connect Salesforce. You’ll then be redirected to a Salesforce authorization page.
- Ensure the following permissions are enabled:
- “Access the identity URL service”
- “Manage user data via APIs”
- “Perform requests at any time”
- Click Allow to authorize the connection. You’ll then be redirected back to Dash Social.
- Confirm that Salesforce shows as “Connected”.
Step 5: Setup Field Mapping
Now that Dash Social and Salesforce are connected, you will need to map your message fields in Community to Salesforce case fields. This ensures any messages escalated from Dash are tied to any required case fields when they appear within Salesforce. To set up field mapping:- In Community, click the three dots in the upper-right corner.
- From the dropdown, select Manage Integrations → Salesforce.
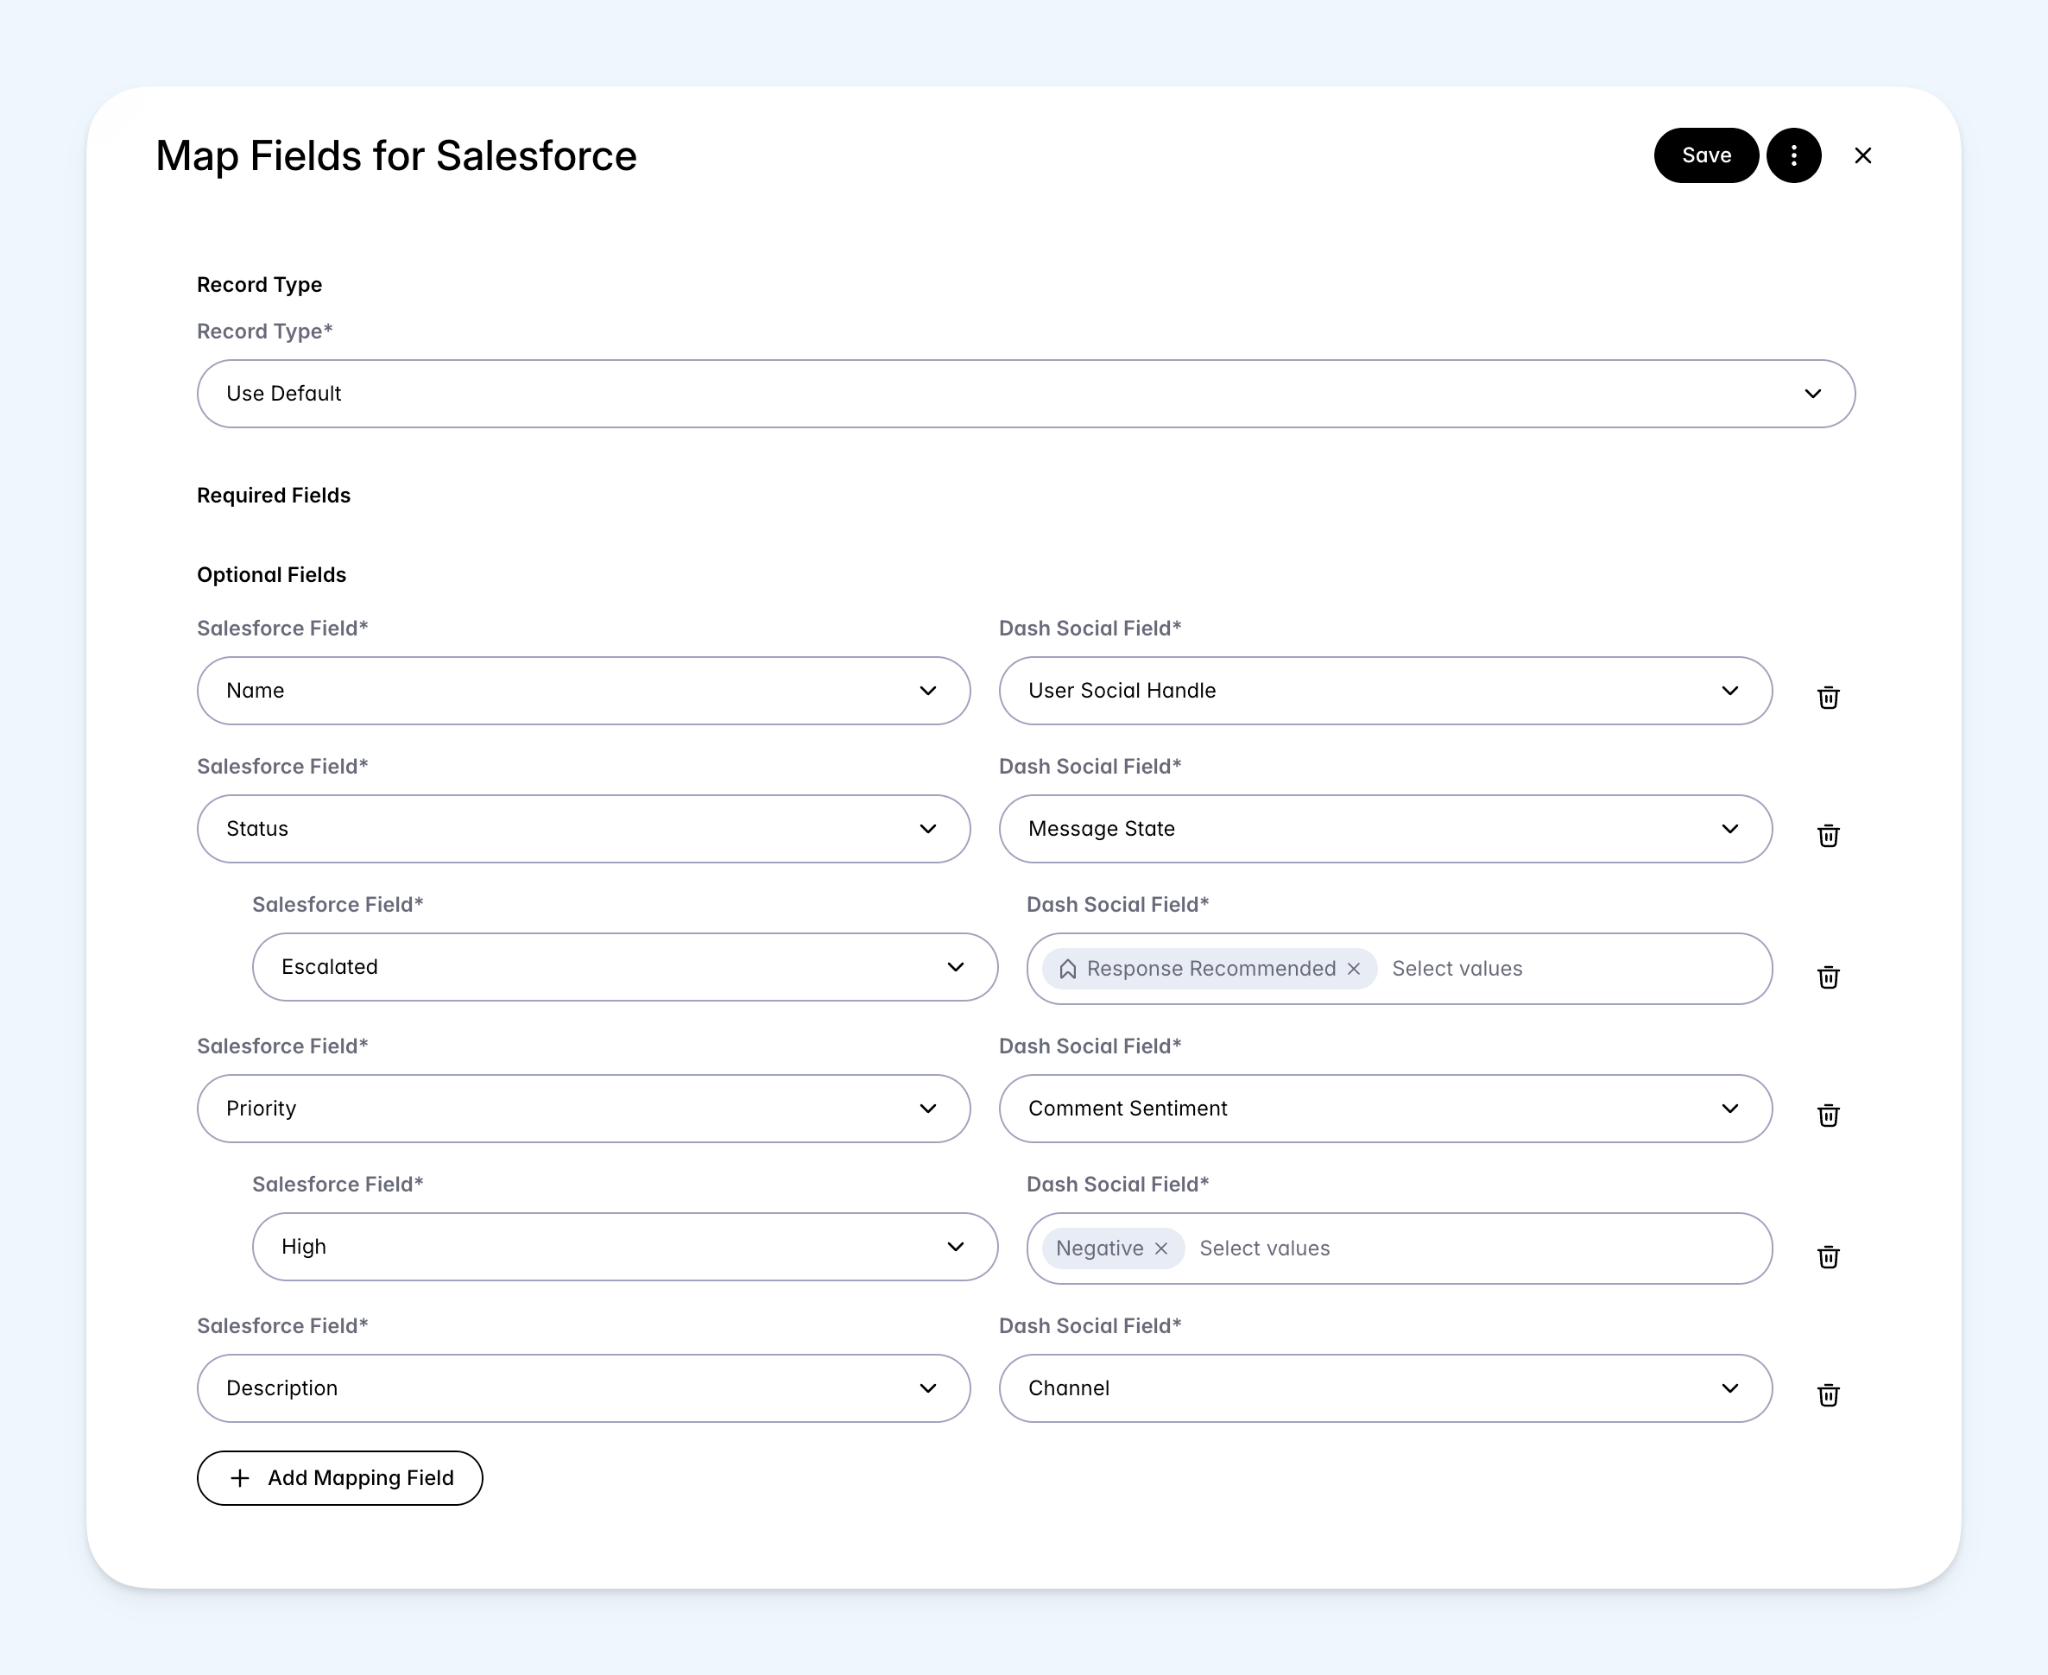
- In the window that appears, start by selecting a Salesforce Record Type. You can also select “None (Use Default)”. The chosen Record Type controls which fields from Salesforce are available and required.
- Select a Salesforce field from the dropdown, then select a Dash Social message field to map it to. For example:
- Map “Status > Escalated” from Salesforce to “Message State > Response Recommended” from Dash.
- Map “Priority > High” from Salesforce to “Comment Sentiment> Negative” from Dash.
- Map “Name” from Salesforce to “User Social Handle” from Dash.
- Click Add Mapping Field + to map additional fields, doing so as many times as needed.
- Once you’re happy with your selection, click Save to apply your field mappings. Any new messages escalated from Dash Social to Salesforce will include these fields. Unmapped fields will be left empty.
Step 6: Test the Integration
You’re almost finished! As a final step, we recommend creating a test case to ensure your integration and mapped fields are working how you wish. To create a test case:- Go to your Community Inbox and find a message you want to escalate.
- Click on the 3-dots next to the message. Then click Create Salesforce Case from the dropdown.
- Head over to Salesforce and navigate to the Cases tab.
- Open the case record you just created in Dash.
- Verify your field mappings are working as desired.
- Click the Dash Social tab to manage the message.
- Confirm that the conversation loads in the Dash Social component.
- Test replying to the customer directly from Salesforce.
- Finally, head back to Dash Social to verify that case updates in Salesforce sync back to Dash.
If you configured “Admin approved users are pre-authorized” in Step 2, the first time a user accesses the Dash Social tab, they may see an authorization popup. All they need to do is click Allow Access to complete OAuth flow! After authorization, the Dash Social component will load.
Creating Cases
Now that you’ve successfully integrated with Salesforce, you can escalate any messages to Salesforce from your Community Inbox in Dash. To create a case, simply open the message that you would like to escalate to Salesforce, click on the 3-dots next to the message, then select Create Salesforce Case from the dropdown. Just like that, your message will automatically appear within your Salesforce cases along with the field mappings you’ve established during setup.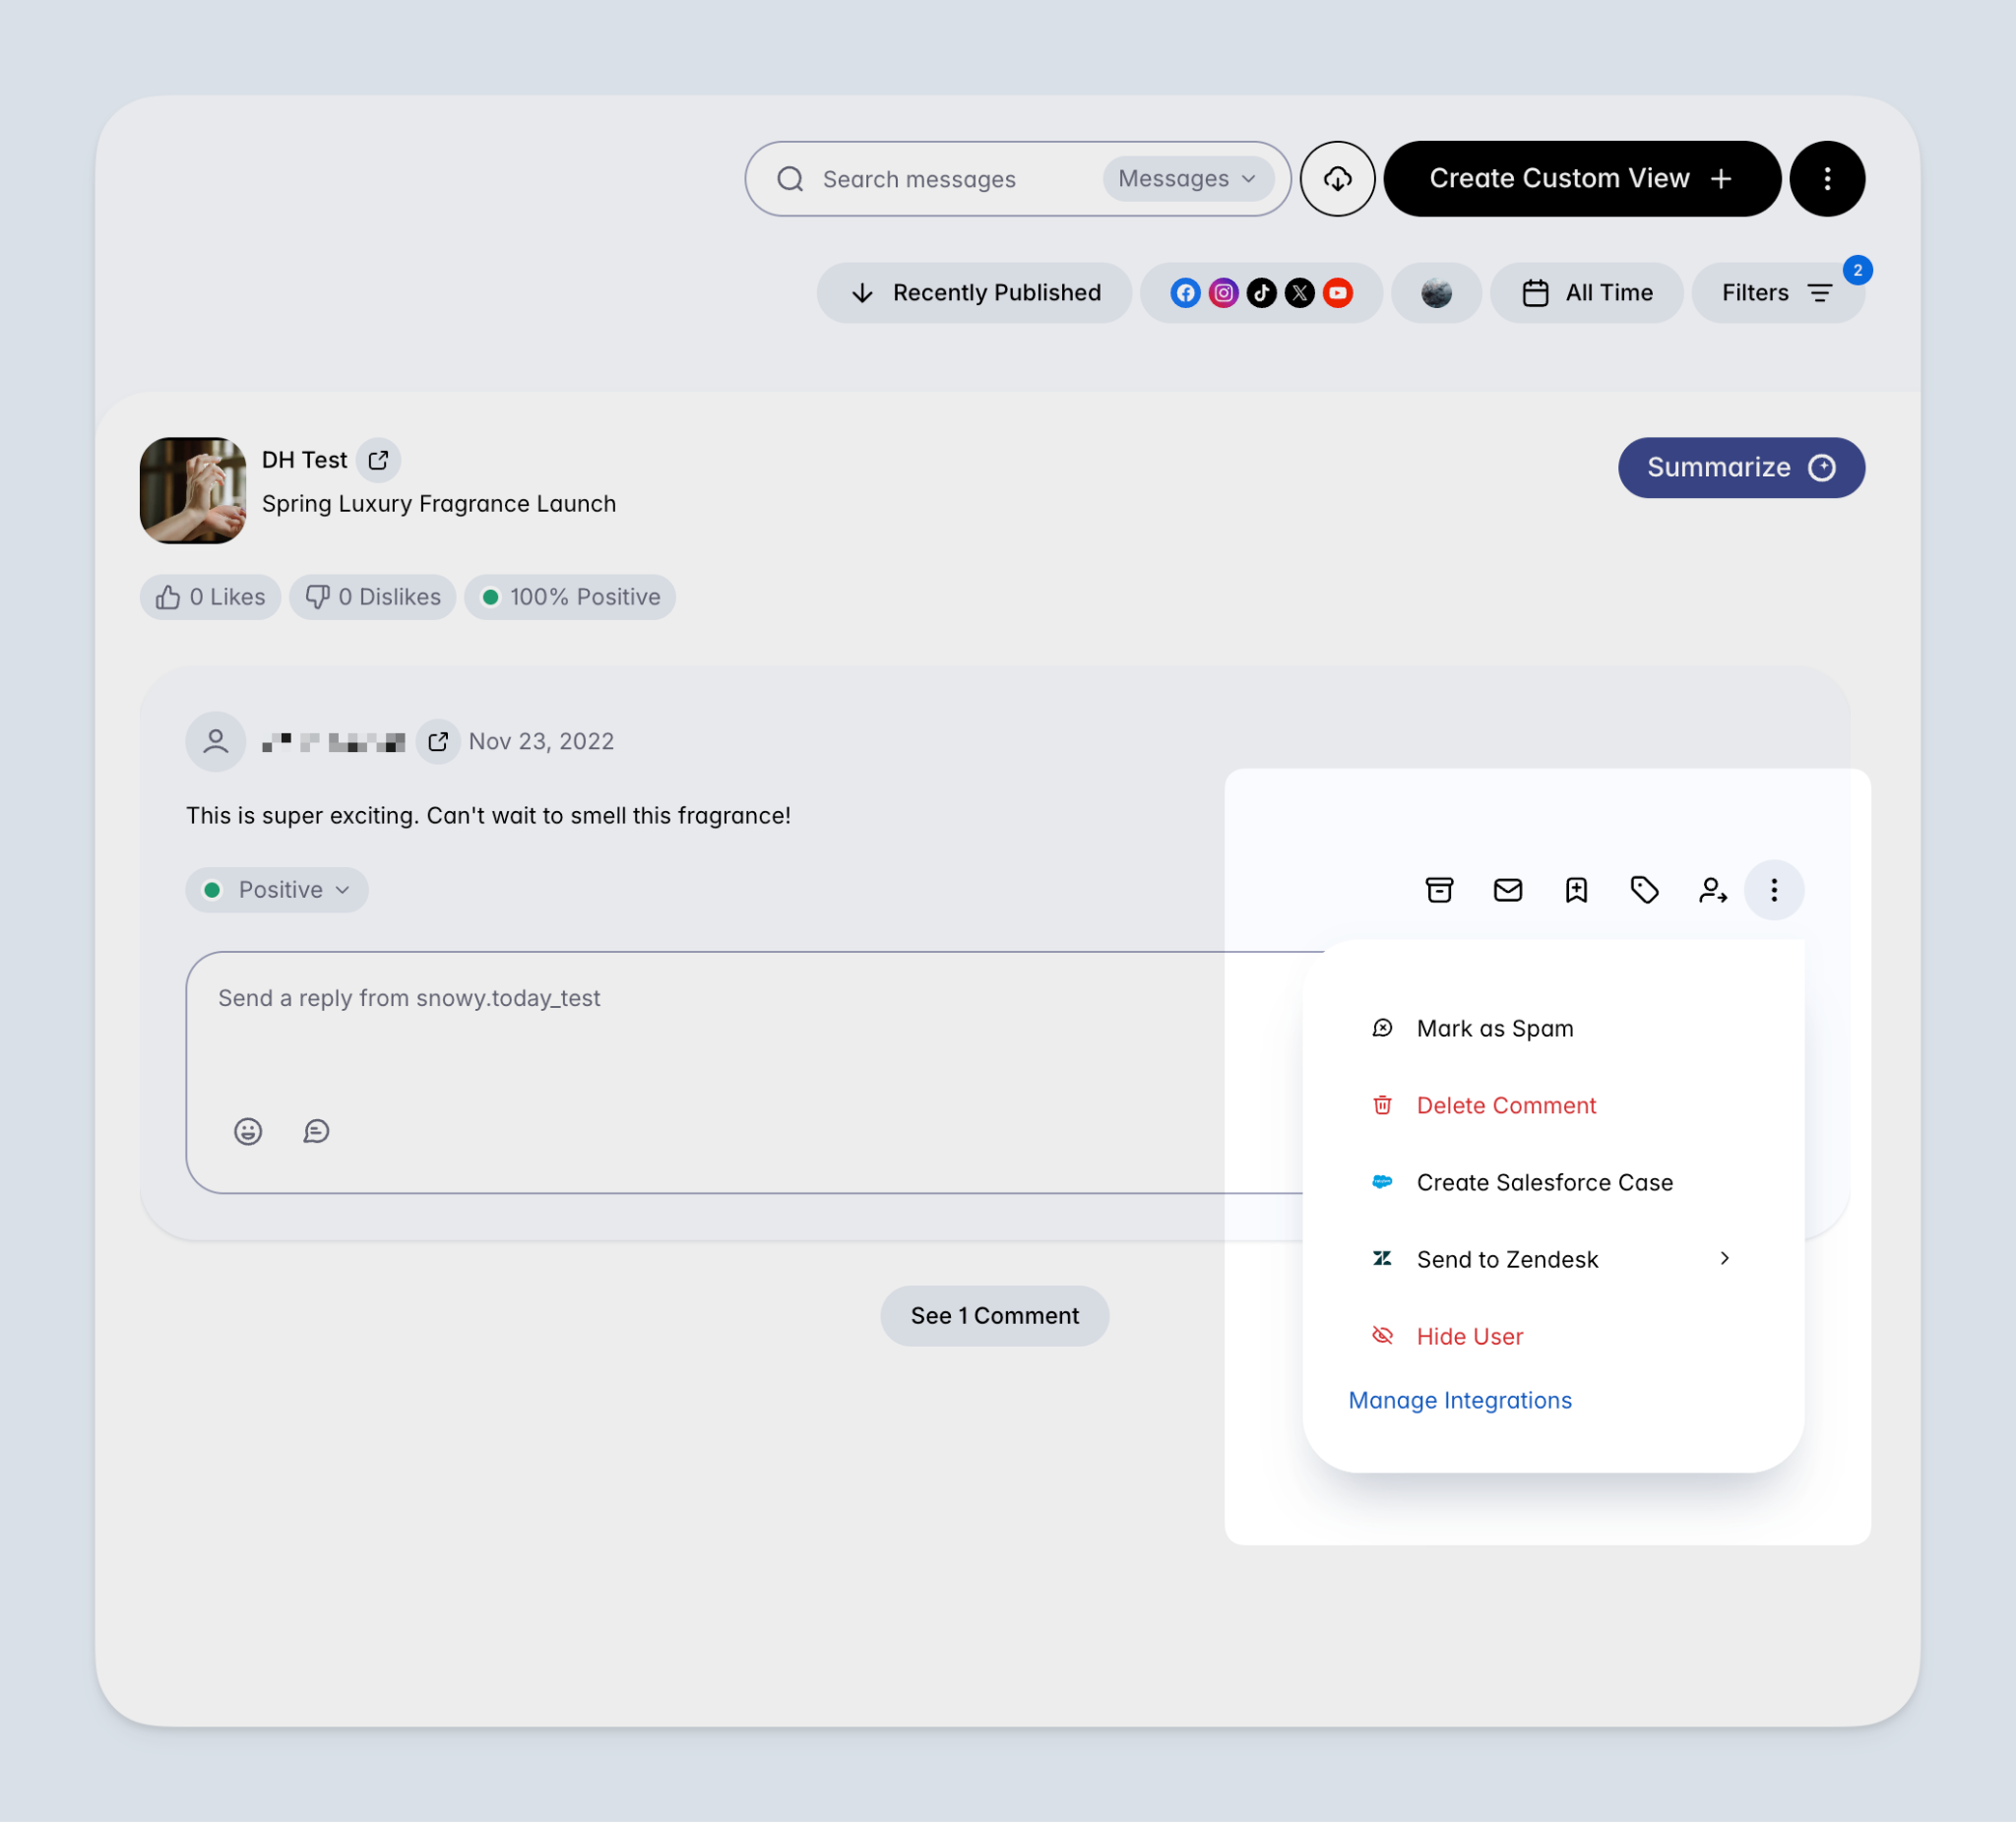
Automating Case Creation
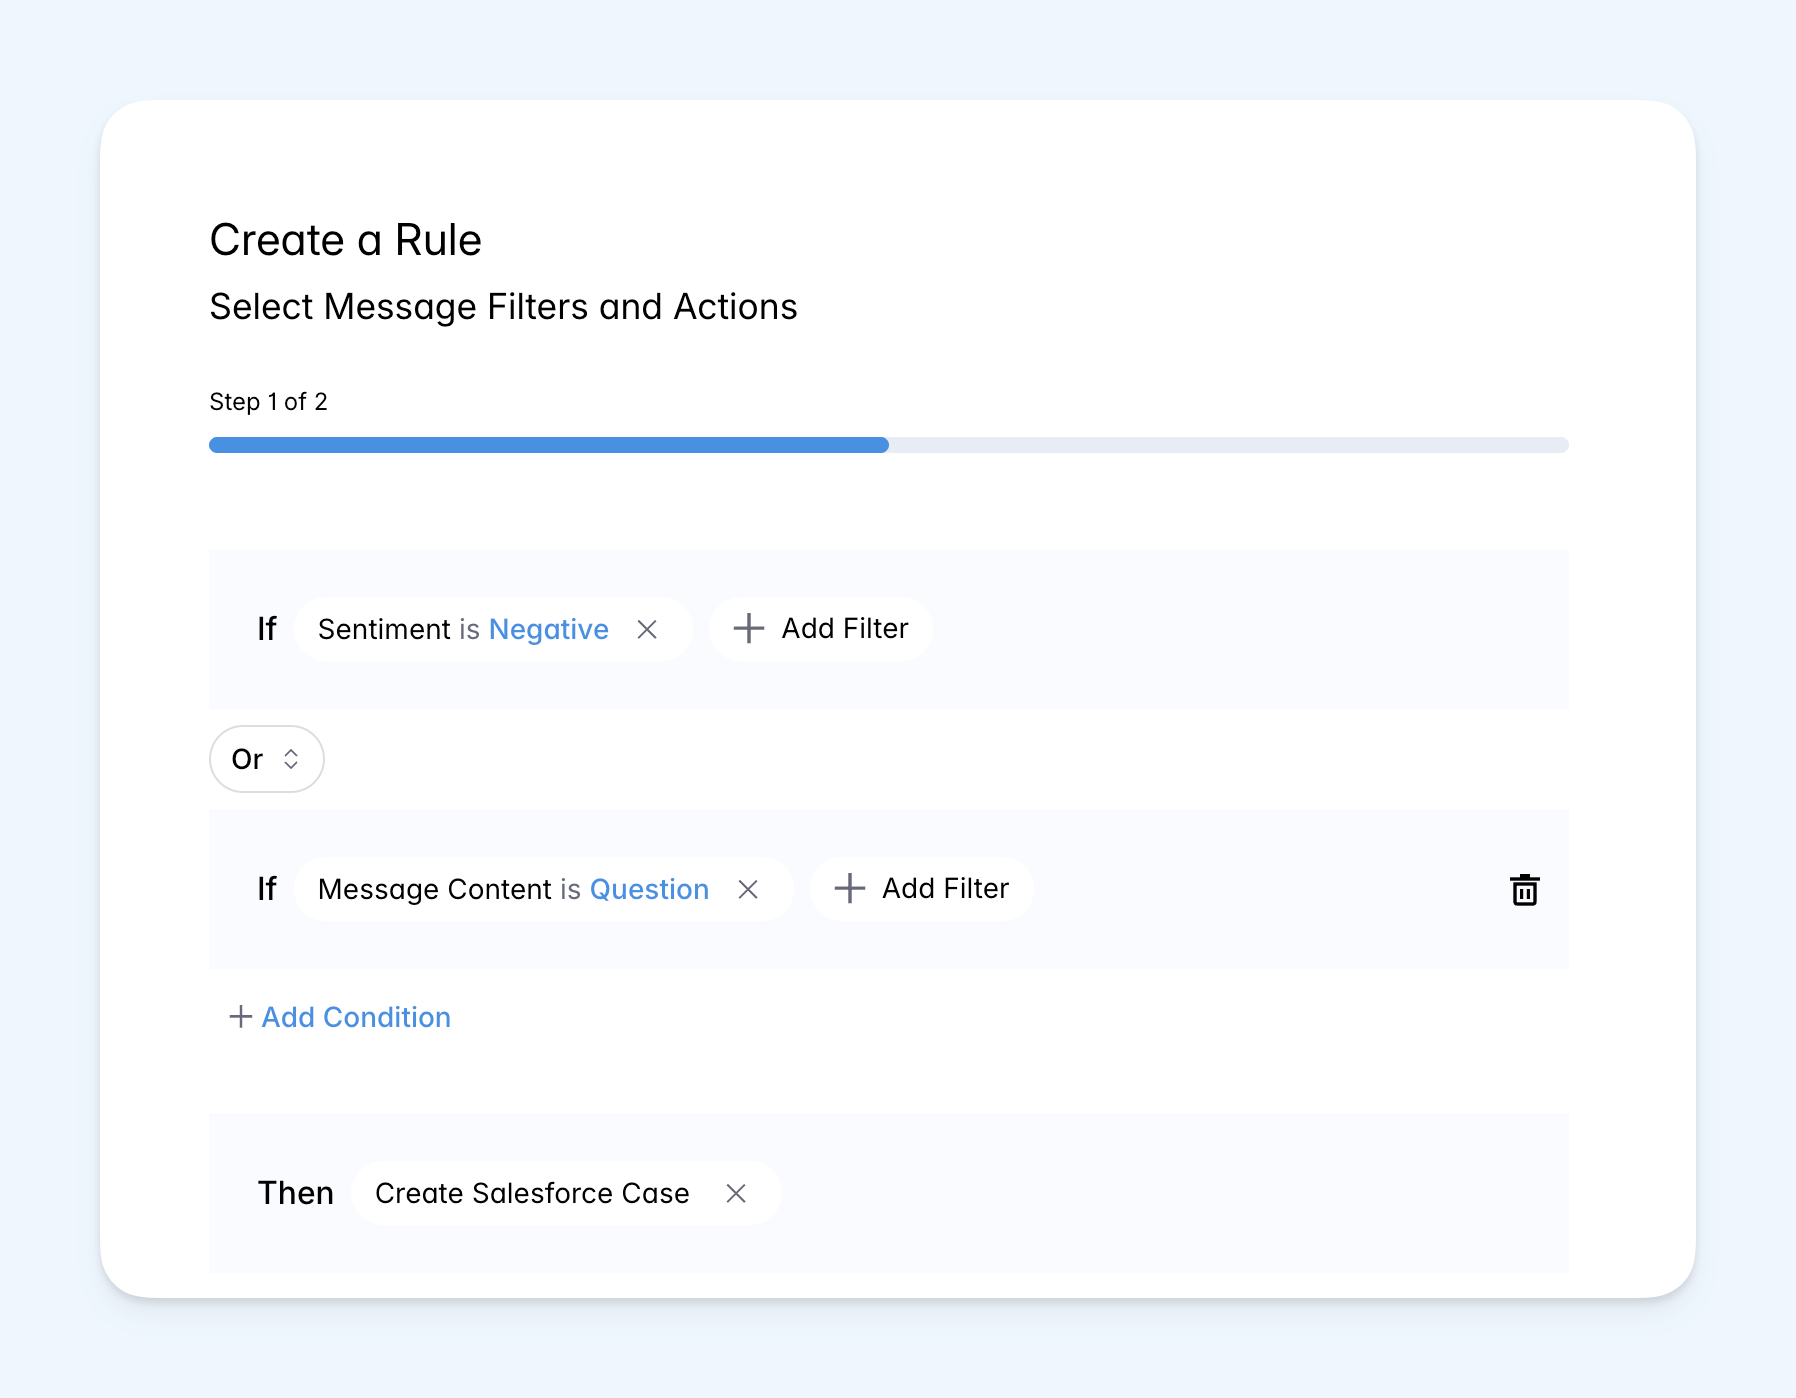
Speed up the process of handling messages and escalating them as cases with the help of inbox automation rules in Community. Using these rules, you can automate various message actions, including Salesforce case creation, based on set criteria such as keywords, sentiment and more. To learn more, read our article on Automating Your Community Inbox.Automation rules are optional. You can always create cases manually from Dash Social, regardless of your rule configuration. You can create multiple rules for different scenarios and enable/disable them as needed.
Frequently Asked Questions
Can I modify my field mappings after initial setup?
Can I modify my field mappings after initial setup?
Yes! You can modify field mappings any time after initial setup.
During the setup process, which permissions are required?
During the setup process, which permissions are required?
When integrating with Salesforce, Dash Social will request permission to:
- “Access the identity URL service” to verify your Salesforce organization
- “Manage user data via APIs” to create and update cases with social media data
- “Perform requests at any time” which is required to sync data between Dash Social and Salesforce.